Monday, December 28, 2009

Weavezine: Rodrick Owen - Kumihimo & Peruvian Braids

New Weavecast Posted on Weavezine.com
48: Rodrick Owen
Produced by Syne Mitchell, 27 December, 2009 - 12:02

250 Patterns from Japan, Peru and Beyond

This episode we chat with Rodrick Owen about kumihimo and Peruvian braids. If you’re not familiar with kumihimo, it’s a Japanese style of braiding that creates beautiful and strong braids. The most common form of kumihimo is woven on a marudai, essentially a small round table with a hole in the center.

You can access the podcast at:
http://weavezine.com/audio/48-rodrick-owen

Have a good day!

Saturday, December 26, 2009

Harrisville Lap Loom - Size A 12" X 16"


Here is the Harrisville Lap Loom Size A 12" X 16" that I have. The pointed flat sticks are the shed sticks. If you don’t have them in your kit you can go to the hardware store and ask for a couple paint stirring sticks. They might cost 50 cents to a dollar each. You might buy some sandpaper to sand a point on the sticks.

As for yarn, the loom is built with pegs spaced every half inch, pegs are 3/16 inch thick. When you warp with yarn that is 8 or 10 wraps per inch in thickness (WPI) your warp will be spaced about 1/2 inch. But there will be a lot of open space between the warps. If you weave with the same yarn, your weaving will be very weft faced, that is the weft yarn will cover the warps. If you are not careful, the weft will pull the warps closer together and spoil your spacing as you weave, so be sure to watch the spacing as you weave.

The instructions have directions for making bags, pillows, placemats or wall hangings.

I wove a single panel out of cotton vari-colored yarn (sugar and creme). The panel was a little too small for a wash cloth after I machine washed and dried it, but I folded it, stitched around two sides, put a drawstring on the open side and made a little pouch to hold soap for the shower. It’s a good way to use up those little bits of soap, especially handmade soaps.

You can also sew together small pieces to make larger ones.

You could even do tapestry with it, I would recommend getting some fat yarn to weave on it.

If you have the “Wonder Wand” which is a square toothed comb looking stick, that is supposed to push down every other warp to make your shed (warp opening) easier. It works if you are very careful not to let the weft (horizontal) threads pull the sides of the weaving in. Once the warp is out of alignment and the spacing is changed, the Wonder Wand does not work.

So be prepared to use one of the pointy sticks (shed sticks) to pick up every other warp to create your shed for weaving.

Have a good day!

Friday, December 25, 2009

A tale of three scarves


3 scarves made on Cricket Rigid Heddle loom using 10 dent heddle. All 6 inch wide and 72 inch long plus fringe. Made with acyrlic yarn, variegated yarn and solid white. Twisted fringe finish. (you can click on photo for larger picture)


This woven with alternating half white, half color warp and woven with two shuttles, one white, one colored. This spread the color change along the scarf.


This yarn was chosen for its earth tones. It's warped alternating half white, half color. I was worried about running out of white yarn and so I wove 4 picks of color yarn, 2 picks white, 4 picks color, 2 white. This did a good job of move the color sequence and the scarf looks different from the first one.


This scarf was made from two skeins of black and grey variegated yarn. I organized the warps into runs of color. I noticed that the color pattern was based on 11 inch sections and seemed to repeat every 88 inches, so I warped 88 inch long. The warp seemed to change to a different shade of color every 11 inches. I wove one shuttle on the weft. When it was time for new yarn, I made sure I cut the yarn at the same color change to preserve the weft color sequence.

I'm really impressed with how well it came out.

Have a good day!

edited to correct: warp on first two scarf is alternating half white, half color, not all white warp.
That is two strands white, two strands color.

Thursday, December 24, 2009

Tamales in My Corner of the World


It is traditional to make tamales at Christmas. To save time we bought a kit from the supermarket. For $30 you get everything you need to make your own tamales!


Sure is a lot of stuff here in this box! There is masa (corn dough), corn husks, cooked pork and red chile sauce, cooked chicken and green chile sauce, refried beans, salsa, and chips! You have a holiday meal in a box.


Although the kit comes with cooked meat, my lovely wife is a fan of cheese and green chile filling. We spread the dough on a corn husk, put fiilling, wrap the tamale with another corn husk and will steam it to cook.


Here is some of the red chile and pork.


First batch of 16 tamales in the steamer basket for about an hour. The second batch was only 9 tamales when I used up all the dough, so I guess we'll only have 27 instead of the 36 as said on the label.

I didn't even open the chicken and green chile packets. I'll freeze those for use on another day.

And that's what's going on in Sacramento, Calif.
Have a Merry Christmas!
Franco Rios

4 Harness Conversion for Rigid Heddle Loom - Cheap!

(from files of the rabbitgeek - Oct 2008)
4 Harness Conversion for Rigid Heddle Loom - Cheap!

If you want to try twill weave with your rigid heddle, you will have
to add heddles or harnesses. A neat trick was just posted on the internet a few days ago.

Leigh Dudenhoeffer added string heddles and harness sticks to her
rigid heddle loom. This site shows pictures and description of the
conversion.
http://fiberfanaticblog.artisticexpressionsinwoolandglass.com/

Build a Loom Frame and How to Use Your Table Loom As a 4 Harness Loom!!!
(two short articles on the page, large pictures)
http://fiberfanaticblog.artisticexpressionsinwoolandglass.com/TableLoom.htm

There is also a VIDEO of weaving on the modified loom 10/09/08
http://fiberfanaticblog.artisticexpressionsinwoolandglass.com/WeavingVideo.htm

The RH actually sits in the holding slot. The string harnesses go
behind the RH since the area in front of the RH is used for the shed.

Be sure to make the recommended visit to
Marla Mallet's website for instructions on primitive loom
construction, heddles, and heddle bars.
http://www.marlamallett.com/loom.htm

Don't put warp through the little holes in the RH, put two threads
through each slot. The RH is used as a reed to maintain spacing. A
comb is used beat/place the weft.

The process is not as fast as using multiple rigid heddles. Advantage is
the cost is low and it uses your existing rigid heddle loom frame. It
give more possibilities to existing equipment.

It is a very clever application.

Much applause to Leigh Dudenhoeffer for sharing her loom conversion
trick on the internet.

Have a good day!
Franco Rios

Wednesday, December 23, 2009

Sprang 3 and Sprang 6


Here is sprang #3, with more practice, my eyes and my fingers are getting used to movements and patterns needed for this basic weave pattern.


Here is sprang #6, becoming more familiar with the movements and where the strings need to overlap for the weaving to work. I have 24 warps on it now. Will start some wider pieces with a long board soon.

I've used string to pull the weaving wide for taking the photo. I've also drilled some holes in the clipboard to anchor the sticks.

Here are some more sprang links

Wikipedia - Sprang
http://en.wikipedia.org/wiki/Sprang

Stringpage.com - Sprang info
http://www.stringpage.com/sprang/sprang.html

Regia Anglorum - Anglo-Saxon and Viking Crafts - Sprang
http://www.regia.org/sprang.htm

Middle Kingdom Textile Artisan Guild
Click on the various sprang articles
http://mktag.org/projects/content.html

Doni's Coptic Bag Sprang Project
http://www.angelfire.com/journal2/donisfuff/coptic.html

Ellen Shipleys Weft To My Own Devices sprang article
http://wefttomyowndevices.blogspot.com/2008/03/sprang.html

Ronald and Blue's Web Site with Sprang and Nalbinding
English Version - Click on pictures to read about Techniques
http://www.denblauwenswaen.nl/engels.htm

Jen's Coptic Sprang Article
with links to other articles
http://genvieve.net/sca/copticsprang.html

Sprang Article from House Ebarra Early Period #7
http://www.housebarra.com/EP/ep07/11sprang.html

Edited to add:
I found another sprang book online at
Egyptisch Vlechtwerk [Sprang], Holkema & Warendorf, 36 pages.
Part 1 file size 4.2MB
Part 2 file size 11.6MB
Description from Anne Blinks
Van Reesema, E. Siewertsz, Egyptisch Vlechtwerk [Egyptian Lace], V. Holkema
& Warendorf's, Uitg-My.N.V. Amsterdam, N.D. 48pp. [Instructions included,
with photos. Also photos of currently interlaced pieces from classes.
This is what we now call Sprang.]
I don't read Dutch, but there are dozens of excellent pictures. The book was scanned as picture so I can't put the text into a translator without typing it all in.

Add this web page to the list of links


Have a good day!

Monday, December 21, 2009

Dress Like An Egyptian

Found a very cool doc while searching for "sprang" and "egypt"

Information Pack on Textiles in the
Petrie Museum of Egyptian Archaeology for Students Studying Textiles at Key Stage 4.
Produced with the support of the Sharing Museum Skills Awards
http://www.petrie.ucl.ac.uk/textilepack.doc

Contents

Introduction: The Petrie Museum of Egyptian Archaeology and its Textiles 3

Section I: Examples of garments and other textiles in the Petrie Museum
Tarkhan dress
Deshasheh dresses
Gurob sleeves
Bag-tunics
Bead-net dress
Beaded headband
Sprang-cap (finger woven netting)
Socks (single needle knitting/nalbinding?)
Household textiles
Soft toys
Painted shrouds and Mummy wrappings

You've got to check this out! Good overview with some interesting drawings!

Have a good day!

Saturday, December 19, 2009

The Sprang Begins


I've been dying to start on this sprang project and so here it goes.
This is the first attempt. This is a very sad sprang.


This is second attempt. Much better looking. Still sad.
Stay tuned for more!

Have a good day!

Autumn Red Scarf on the Cricket


(click for larger picture)
This is a scarf woven for my son's friend at school who happens to be a girl. Since they've already exchanged gifts it's not a secret so I can post it. The scarf is about 4.5 inch by 72 inch. The yarn is Caron Simply Soft "Autumn Red" acrylic with a couple of strands of white acrylic for accent.


Here is the scarf on the Cricket rigid heddle loom. My son went with me to select the color and yarn. I warped it, started the first two inches and then he started weaving. He did a good portion of it over a couple of evenings, not bad for a kid who is 13 years old anyway. I had promised him we would not miss the deadline so I finished it for him when he had to go to an evening program at school.

So the next night we finished it, washed it, steam ironed it, wrapped it and put a bow on it. He gave it to her the next day. He says she liked it.

I promised him it would not look lame and I think we did good.

Have a Merry Christmas!

Friday, December 18, 2009

Backstrap Weaving blog

There is a new blog on the net

Laverne Waddington in Bolivia has created a blog focusing on Backstrap Weaving.

She already has posted a new idea for a project - double weave mug rugs

Go visit the blog for more info
http://backstrapweaving.wordpress.com/

Have a good day!

Tuesday, December 15, 2009

Fingerweaving in December


I've been taken my clipboard and fingerweaving on the train the last couple of days and here is more things I'm learning. (click photo for larger view, back to return to blog) From the book Finger Weaving: Indian Braiding by Alta R Turner, the above is Peruvian Rep Braid, where one set of strings (the yellow) is always a warp that covers weft and the other set (the blue) is always a weft going through the warp. It create a zig zag pattern. The fringe is 4 string braid.


This next pattern is Peruvian Cross Rep Braid, where the yellow strings are always a warp that covers the blue and also covers the yellow where it crosses in the middle. The blue never covers the yellow and covers the blue in the middle cross.

The yarn is Sugar and Cream worsted cotton 4 ply yarn, 12 WPI.

Have a good day!

Wednesday, December 9, 2009

Self Stripe Washcloth on Frame loom


I did some washcloths for a friend on my little frameloom. The yarn is Sugar & Creme self striping worsted cotton yarn. I lost the label and don't know the name of the color. I arranged the warp & weft so it looked like a color gamp sample. Woven size is 12 x 12 inch.


Here is the finished cloths, color not so good in this pic. Size came out 11 x 10 inch.


Folding table legs set up for warp the yarn at 12 inch.


After warping 120 threads, tables were no longer in line. Will put weight on tables next time.
I could not use this warp so I started over.


This time I am continuous warping the dowels on the frame. Starting continuous warp.


After warp is done the edge is twined then lashed to dowel/loom beam.


A metal tooth comb is used as a beater.


When things get tight, the flat shuttle stick is traded for a chopstick with a hole drilled in the end.

Have a good day!

Saturday, December 5, 2009

Youtube: Spinning yarn on a pencil

Anybody who has read my blog for any length of time know how much I love primitive, simple tools. So when I saw this link posted on Ravelry.com I know I had to pass it alog.

Spinning yarn using a pencil as a makeshift spindle
Zaftigwendy shows how to spin and how to ply by rolling a pencil on the thigh.


http://www.youtube.com/watch?v=zZ5YSPAEzJU

I love simple fiber tools. I've never seen this technique before but it makes so much sense.

Have a good day!

Sunday, November 29, 2009

A new Cricket trick and a scarf


Here's the latest finished scarf done on the Cricket loom (click on pictures for larger image), it's acrylic yarn, the colors are like strawberry, chocolate, vanilla ice cream. I warped the variegated yarn in pairs separated by pairs of white yarn, this spreads the color in a wider pattern than just straight plainweave.


Here is some of the yarns.


Warping the Cricket.

Before winding on, the warp is attached to a book bag with a dog leash. The resistance of dragging the bag across the carpet puts enough tension to tightly wrap the yarn on the beam.


And here's my new trick. The threads on the Cricket warp beam can cross each other, causing the shed not to open fully when weaving. So using chop sticks to make a new cross on this side of the heddle, I can straighten the warps so there is no problem on the weaving side of heddle. I just push the sticks back and over the big dowel when I advance the warp. Much faster than using a crochet hook to chase all those threads.

Have a good day!

Time out for dinner - tostadas


Time out for dinner. My lovely wife said this dinner is so pretty I should take a picture of it. So here is the picture. (click on picture for larger view)

A tostada is a corn tortilla shell toasted in hot oil until crispy. You can buy the shells in the market already toasted, but I prefer to toast them myself because they taste better. I toasted these in peanut oil.

Then a layer of warm refried beans (canned this time) is spread on the shell, followed by a layer of seasoned meat (ground turkey with chili powder and spices), some lettuce (romaine, cabbage, carrot salad mix sliced into slivers), and some grated cheese (medium cheddar and jack cheese bought already grated and mixed in a bag).

You can also add more toppings like tomatoes, olives, sour cream, guacamole (avocado sauce), or salsa. I just like to keep it simple.

That was dinner tonight and just a snapshot of my corner of the world, Sacramento, California.

Edited to add: You eat the whole tostada, crispy shell and all. Pick up carefully and keep it over the plate in case the shell cracks and spills the goodies on your lap.

Have a good evening!

Sunday, November 22, 2009

Fingerweaving in Nov


I've been fingerweaving on the train on the way to work. I didn't get any usable pictures on the commute, but here is a couple of items I am working on.

(Click pictures for larger view) I thought this was called Peruvian rep braid, but it's not and now I don't know what it's called, flat weaving?. As you see the contrast threads move diagonally through the band. The braid is about one inch wide (12 strands of cotton yarn) and length is about 18 inch.


Here is the flat weaving next to a typical Peruvian flat braid style weaving. The yellow band is kind of a sampler, I shuffled the contrast threads around to vary the appearance of the pattern.

Have a good day!
(edited 12/14/09 to correct the braid name)

Saturday, November 14, 2009

Black/Purple log cabin weave


Here is my next log cabin scarf in progress with the other two colors of wool yarn, the black and the purple. (Click on picture for larger view)

The color pattern is very subtle. I am having trouble keeping track of my color changes and you can see where I missed a color change (purple instead of black at change).

I am weaving under the best light in the kitchen in the evening, but today is with all the windows open for light.

I know it is going to look great when when its done.

Have a good day!

Wednesday, November 11, 2009

Finished Log Cabin Scarf


Here is the finished log cabin scarf! (click picture for larger image)

I hand washed it in lukewarm water with Woolite soap to set the wool and to full it a little bit. I gently squeezed the fabric in the soapy water for about 15 minutes, then rinsed it through two changes of lukewarm water. I was surprise how cloudy the water became, I think there is some sizing or starch in the wool yarn.

I squeezed out the water, do not wring, then rolled it in a towel to absorb most of the moisture, then remove from towel. drape the damp scarf over the back of a chair and let it sit overnight. Trim off the extra bits of yarn and the tips of the fringe. It's finished!

Many thanks to Claudia at Weavolution.com for suggesting this pattern for a Weave-A-Long group weaving project.

Now on to the next one!
Have a good day!

Tuesday, November 10, 2009

Log cabin - twisted fringe


Okay, here's my scarf after I cut it off the loom. (click picture for larger view) For this project I am using twisted fringe as described in the instructions for the log cabin pattern found at

http://www.schachtspindle.com/pdfs/newsletters/newsletter2005-01-spring.pdf

Working groups of 5 strands, 2 of one color and 3 of the other, I twisted the group of 2 tightly, twisted the group of 3 tightly, twisted those 2 groups tightly in the other direction and tied a knot to make it 6 inches long. Read the newsletter. Note: The newsletter describes making a table runner, I just changed dimensions to allow for a 6 inch by 72 inch scarf.

Some of the loose ends of yarn will be woven back into the scarf. Some will just be snipped off after wet finishing.

Next step will be to wet finish.

Have a good day!

Sunday, November 8, 2009

More log cabin details


Here is a picture of the crossed threads on the back beam after advancing the cloth.
(click picture for larger view)
This is because of the thread sorting I did after direct warping the loom. The crossed threads above the back beam (upper dowel) will prevent a clear shed when weaving.


Here is the back beam after straightening the threads so none are crossed over each other. Below the beam doesn't matter until I advance the warp again and will straighten all again. A crochet hook is very handy for this. Don't keep the warp super tight while doing this. Have your heddle in neutral position. My loom is on a folding wooden table (tv tray table) and easy to turn around.


Here is some detail of the weft splicing. I over lap the weft two inches to blend in with the pattern. I also try to splice on a pattern change. The yarns sticking up will be cut off after wet finishing.

Have a good day!

Saturday, November 7, 2009

Log Cabin pattern scarf on Cricket Loom


(click on pics for larger view)
These are the yarns I have (Paton's Classic Wool, 100% wool worsted) to choose from for the Log Cabin Weavealong on Weavolution.com this weekend. Black, White, Red, Purple. I chose red/white for best contrast so I can see what I'm doing.


This is 30 pairs of warp (60 ends) on 10 dent heddle for 6" scarf on the Cricket loom.


After winding the warp, I have to sort out the pairs according to the chart I found on the Schact newsletter at this site
http://schachtspindle.com/newsletter/PDF/Newsletter2005-01-Spring.pdf

(link updated 6/12/2013)


First an inch of waste yarn to set the spacing, then two shuttles of red/white, I duplicate pattern I used to warp up. Switch is every five pairs, but still plain weave. I overlap/twine the edges where the colors cross.


OOOPS!! Missed the change. Unweave - do over!


That's better! More later!

Warning: My wool yarn is sticking. Clear the shed every time!

Have a good day!

Monday, November 2, 2009

Finished Scarf for Weavolution Weavealong


I finished weaving the scarf yesterday. Somehow I lost track of the length and it came up a foot shorter than planned. I wanted six foot and this finished a little over 5 foot including the fringe. I think In underestimated the cutoff length. But mostly I just goofed!

Today I finished the ends with a row of overhand knots, then two rows of knots to make kind of a fish net look, then pairs of ends with knots at the ends. Now to put it into the wash for wet finish. Finish ends are about five inch long.

Have a good day!

Saturday, October 31, 2009

Scary Halloween Picture


(Click picture for full size image)

Here is my scary Halloween picture. I look just awful in brown.
I’m weaving a scarf on a Cricket RH Loom.

Have a happy All Hallows Eve!

Thursday, October 29, 2009

New Yahoogroup for Backstrap Loom Weavers

Backstrappers · Backstrap Weavers on yahoogroups http://groups.yahoo.com/group/backstrappers/

This group is a meeting place and resource for those who weave on a backstraploom and others who wish to learn and/or find out more about this ancient,traditional, and very-much-alive-and-kicking weaving technique.

The backstrap loom itself consists of a few sticks, around which the warp isstretched, then one end is fastened to a stationary object and the other end tothe weaver to maintain tension. It can be rolled up and stored out of the waywith the weaving still on it, and set-up costs are minimal.

Some of the mostbeautiful fabrics in the world are woven on the backstrap loom, and thebackstrap is probably still the most common loom in in use in the the worldtoday.

The portability of this loom, along with its small footprint, makes it ideal forour modern busy lifestyle. The variety of fabrics that can be woven on this loommakes it a viable alternative to larger more complex floor looms, and provesthat it is far more than just a toy, or a historical curiosity.

Please join the new group at
http://groups.yahoo.com/group/backstrappers/

Have a good day!

Sunday, October 25, 2009

Fingerweaving - pencils, belts, finishes


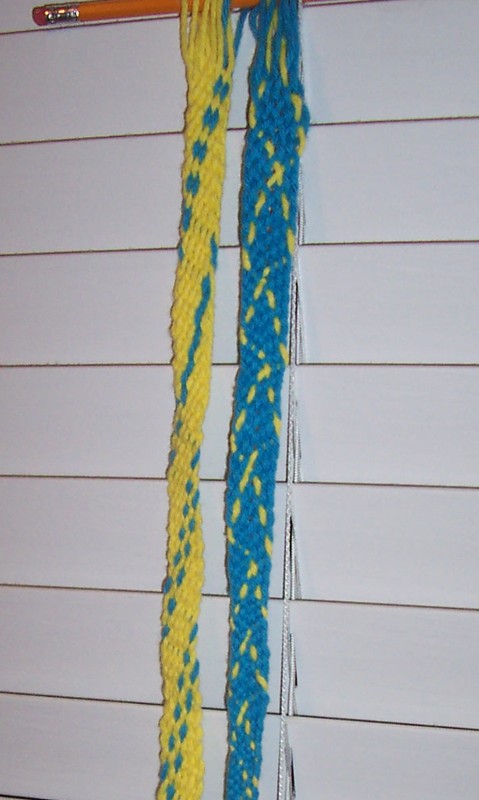
The fingerweaving is coming along, but I find it terribly slow. I found that using pencils to hold the two warp layers separate is helpful, but still very slow. Using rubber bands to hold the pencil to one set of warps makes it easy to add that weft string that comes out each row to become warp. Use short rubber bands or twist your rubber bands to shorten them.

Thank goodness I’m using fat cotton worsted yarn! I think I want to try this with some leather strips and laces.

On the yahoogroup Weaving, Sharon says she bought the book "Fingerweaving Basics", Gerald Findley. She says the illustrations are fantastic, but she can't find any directions for stopping or starting without braids or fringe. She would like to make a belt with a buckle or D rings.

Finishing by braid and fringe is traditional and about the only way to finish it without sewing.

"Basic Book of Fingerweaving" by Esther Warner Dendel shows a couple of belts, including one belt that uses a standard buckle at one end and finishes with a pointed end on the other. You might find this book in your library or it is available from the usual booksellers.

As Robin said, you could start your weaving by looping your warp through a D ring (or two D rings) and weaving down from there. I think with D rings at one end you could tie off the other end with overhand knots close to the weft, trim the fringe short and have a strap that can be run through the D rings.

If you want a squared off edge at one end, try looping your warp over a piece of coat hanger wire or other thick wire, then tying that to a dowel. This is a trick that strap weavers use to get a tiny set of loops on one edge that can be finished after weaving by pulling the wire out and weaving a final row or two of weft through the loops with a needle. The other end would still need to be finished by knotting or sewing.

Another way of doing would be to use a sewing machine to sew a couple rows across to stabilize the weave, cut across the strap, attach buckle and sew the strap down like you would a store bought strap.

Lastly, I have been wondering if a person could weave the ends back into the piece, in the manner of tapestry weavers and rug makers.

Another reply on Weaving by JEC of NEPA suggested the use of leather or plastic fabric to make a tab to fasten the buckle to the strap by sewing. Then take two pieces fashioned into a point to fit the buckle, then inserting the belt into the point and sew it in.

It's really good to be able to tap into all these sources of ideas and inquiries.

Have a good day!

Understanding a bungee cord

The bungee cords I buy are elastic strands with a woven/braided cover and a hook at each end. There is even a "sport" called bungee jumping where you jump off of high places with elastic bands tied to the feet.

As I study on finger weaving and braiding, usually braiding is done around a rope or cord to prevent stretching. Apparently one can braid around elastic bands, Then when the elastic stretches the woven cover stretches with it. With some experimentation someone could determine the best weaving angle or pattern for the cover.

It's interesting to see how things are put together. I've used bungee cords to tie down tarps and hold gates open/closed and only now understand the construction of the bungee cord.

It's not a terribly important detail, but it is one more thing I understand as a result of the fiber adventure.

Have a good day!

Monday, October 19, 2009

Fingerweaving - Chevron Pattern


Chevron pattern belt continues.

I have moved from the clipboard to a chair. The top of the weaving is held by a string that goes over the chair and is tied off to the front of the chair. The dowel at the top seemed like a good idea, but it did not work as planned. Because each strand has a loop around the dowel, it is spaced out as if plain weave. This needs to be closely spaced for warp faced weave.

Next time I will tie off bunches of yarn to the stick instead of wrapping a single turn on each yarn end.

The first part is plain weave at top, but becomes more warp faced as it goes down away from the dowel. This is supposed to be like two flat weave belts side by side. The selvedges should interlock at the sides. At first I made the mistake of interweaving the warps from the left side across the right side, and vice versa.

Then I read the directions again and saw that I should have been interlocking the two inner warps before weaving from center to the outside. Also need to get tension even on each side, it takes some practice. I stopped trying to flip the piece. I was having a tough time remembering what direction I was working on.

I've been unweaving and reweaving rows as needed.

It's getting better.

One thing to watch for is when I grab the bundle, a warp string can get pushed to the side and out of line. Then it is like a float. Or worse it pops up two stands over and creates another error. So keeping close track of the warps in the bundle is important.

Have a good day!